

One of the nice features SuperSaaS has is payment gateway integrations, which allow end-users to easily pay for their reservations online. Refunds due to cancellation are implemented in the form of a credit balance for each user, so the system keeps track of those on a per-user basis.
It can sometimes be useful to have a detailed look into the actions that affected user credit balances, but the dashboard doesn’t have such a panel yet. It’s in situations like these that combining services like Pipedream integrations with SuperSaaS and Google Sheets can be very handy.
This post is a step-by-step tutorial for setting up the logging of user credit information to a Google Sheet using Pipedream, a powerful API integration service.
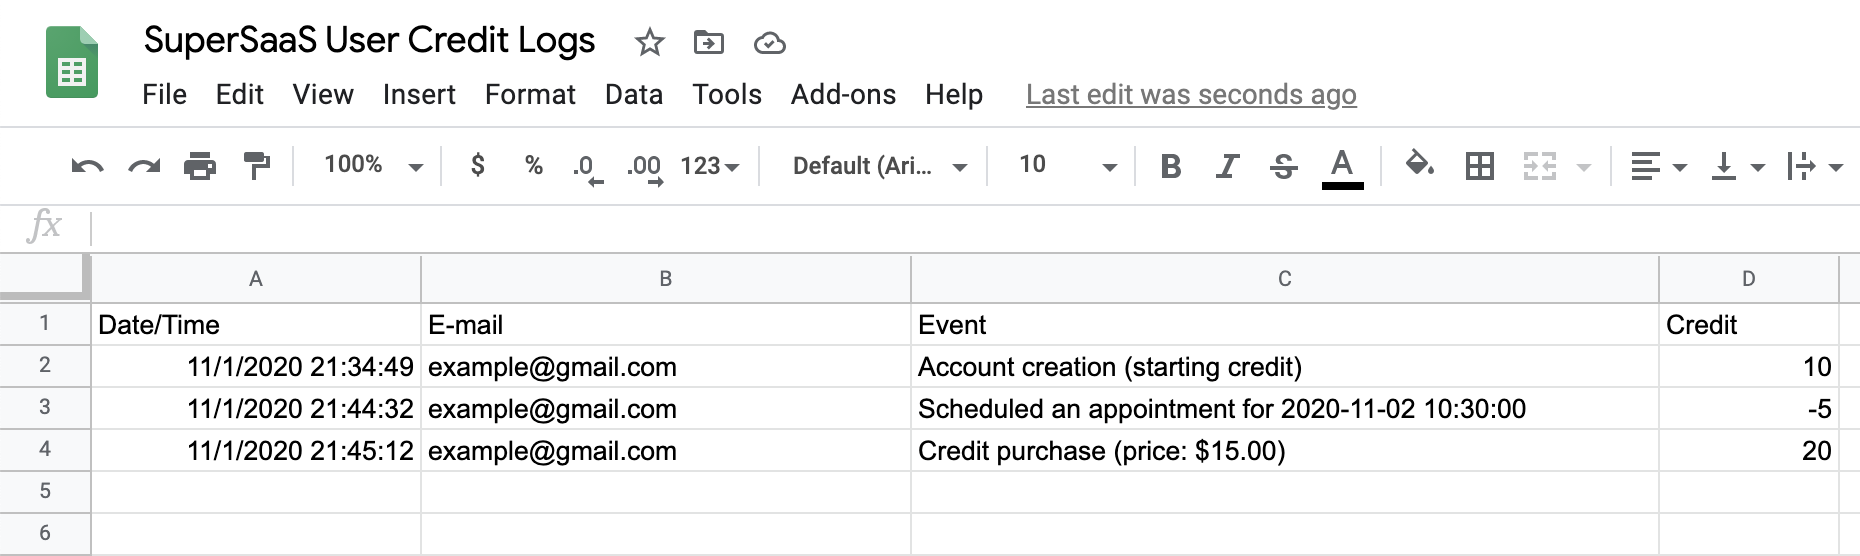
At the end of this tutorial, your spreadsheet will look like this:
Pipedream account and spreadsheet creation
The way Pipedream works is you create ‘workflows’ which are information flows capable of connecting multiple services, such as SuperSaaS to Google Sheets. For this particular use-case, a single workflow is enough.
The first thing that needs to be done is to create an account on Pipedream.com. Make sure that you’re authenticated before proceeding.
Once authenticated, open the SuperSaaS: Log credit changes to Google Sheets workflow template and click the "Copy" button. This will take you to your new workflow page, which is based on the template we provide.
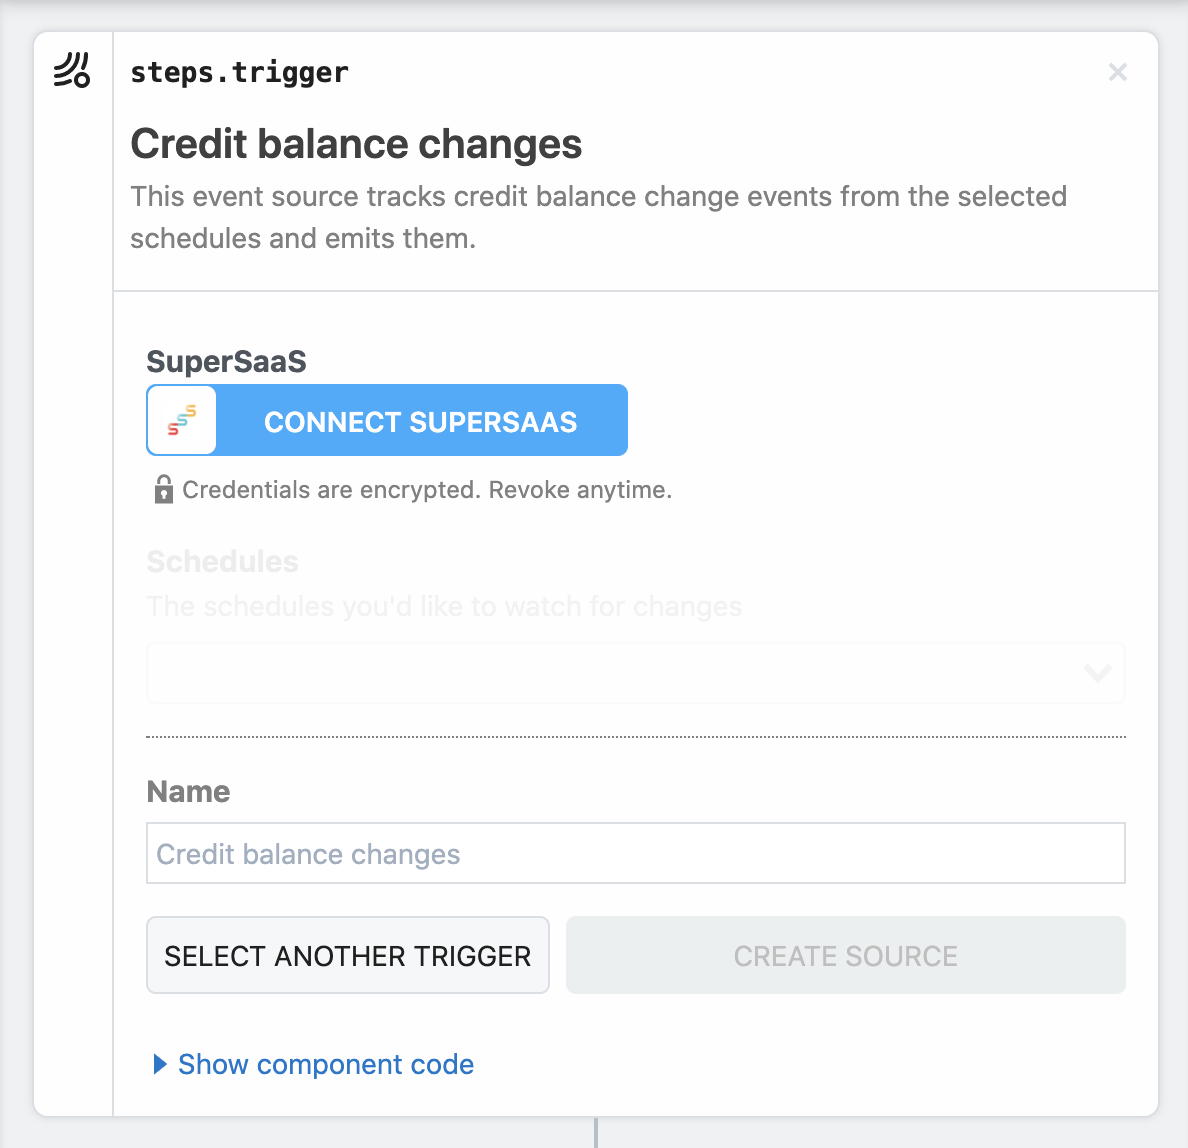
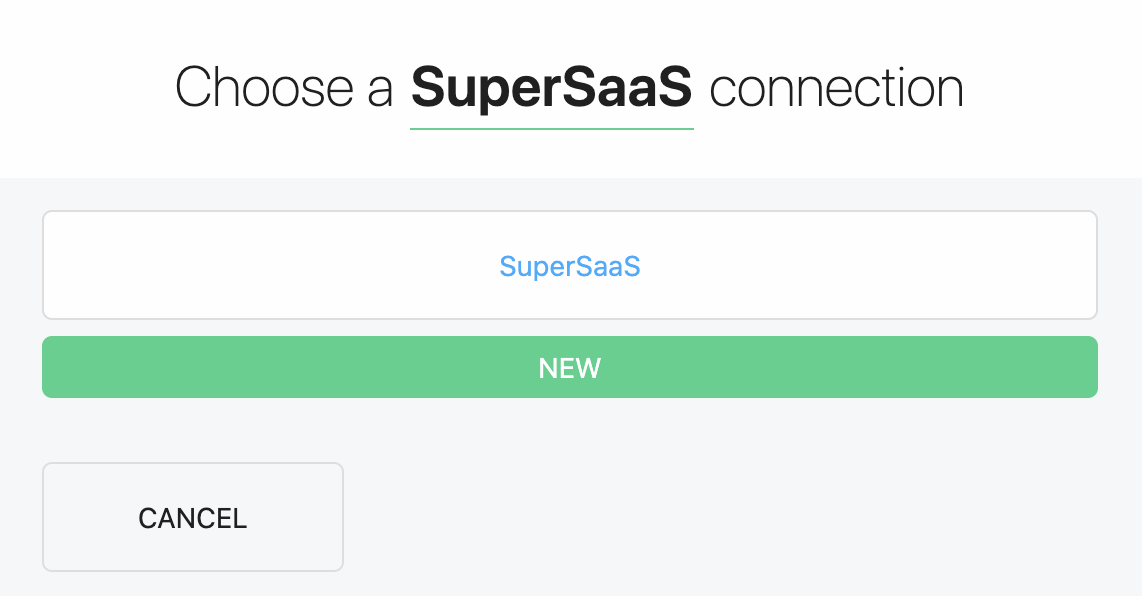
Click the blue "Connect SuperSaaS" button. Since this is the first time you're setting up a SuperSaaS connection in this Pipedream account, your only option is to click the "New" button in the dialog that opens up, but once you've configured one for the first time, it will show up on this list for reuse if you want same credentials elsewhere in your workflows:
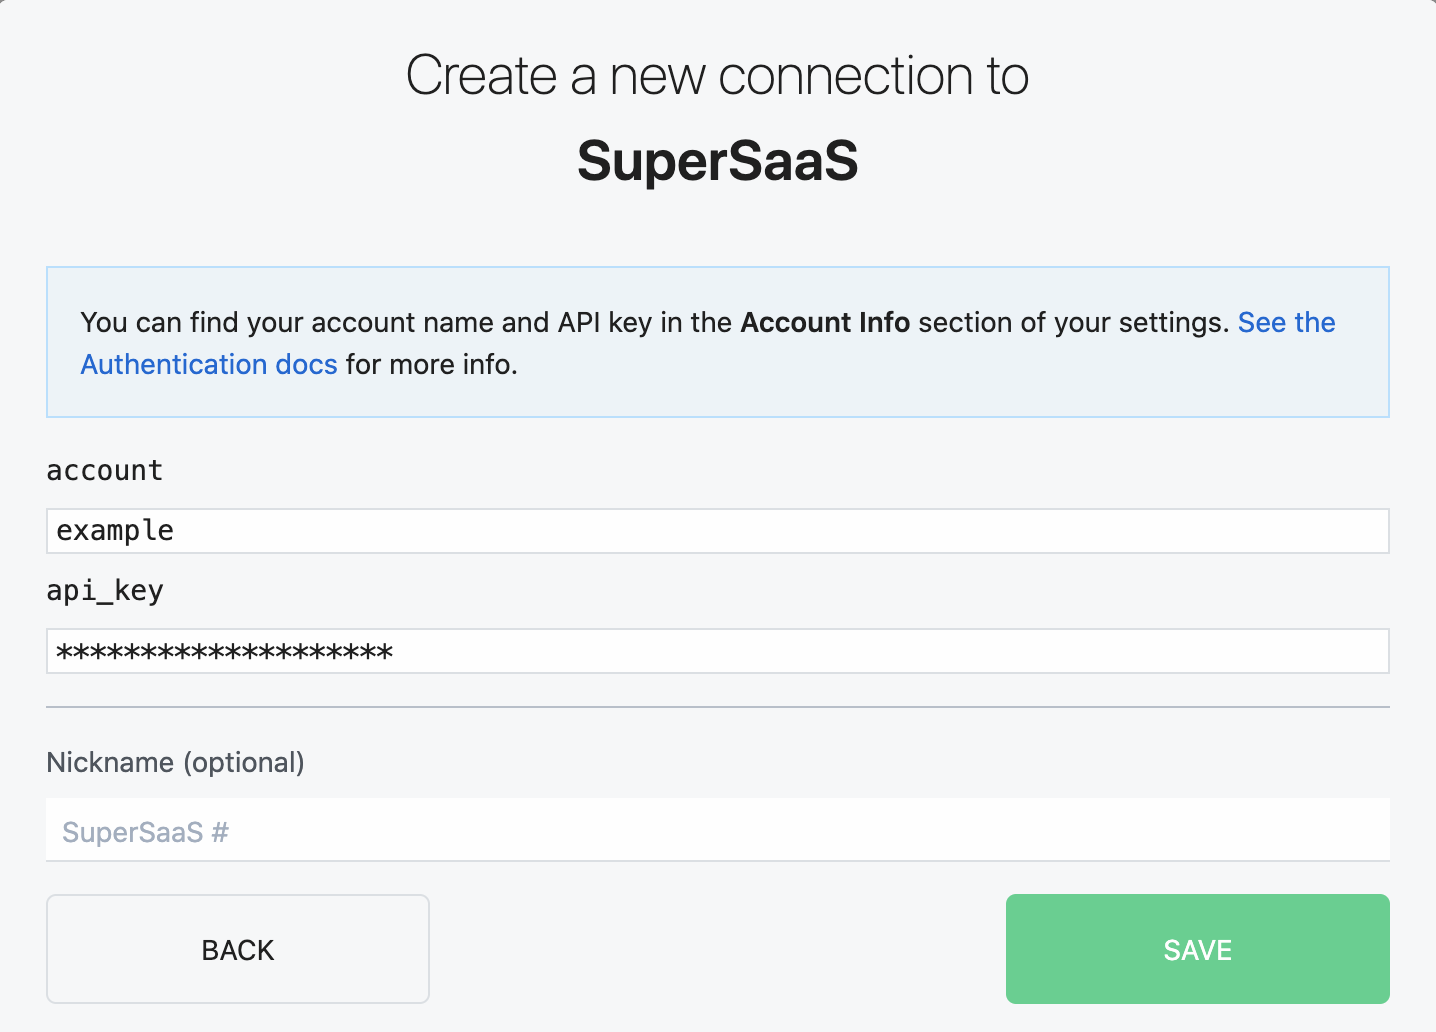
Follow the instructions in the dialog to create the connection between your Pipedream and SuperSaaS accounts. Either use your SuperSaaS API key or just enter your account name and password (in the api_key field) and click the "Save" button:
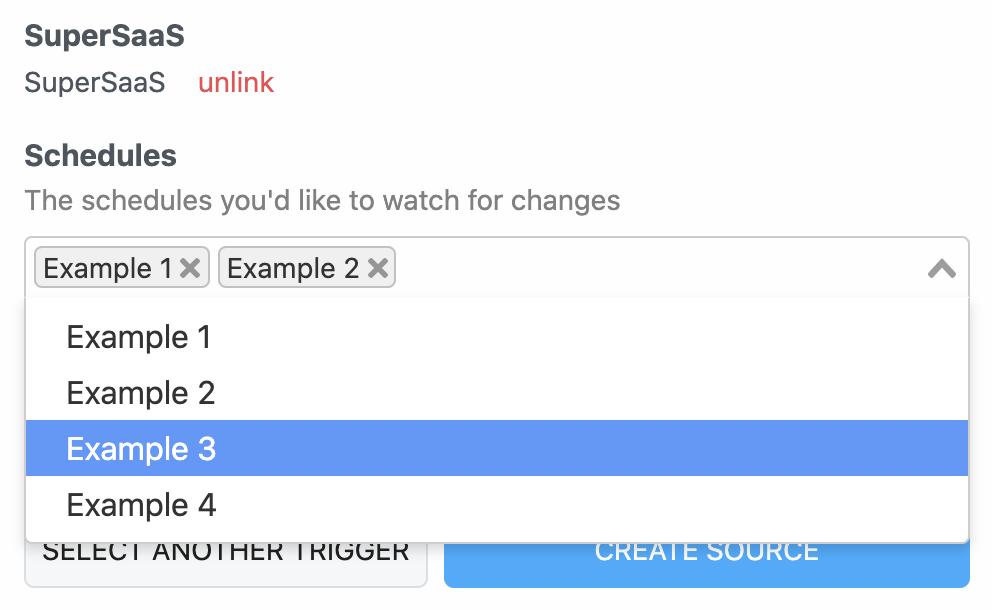
Now select all the schedules in which your users might spend their credits. This workflow will not track credit spent on other schedules, so select all of them to make sure your spreadsheet won’t be missing any data:
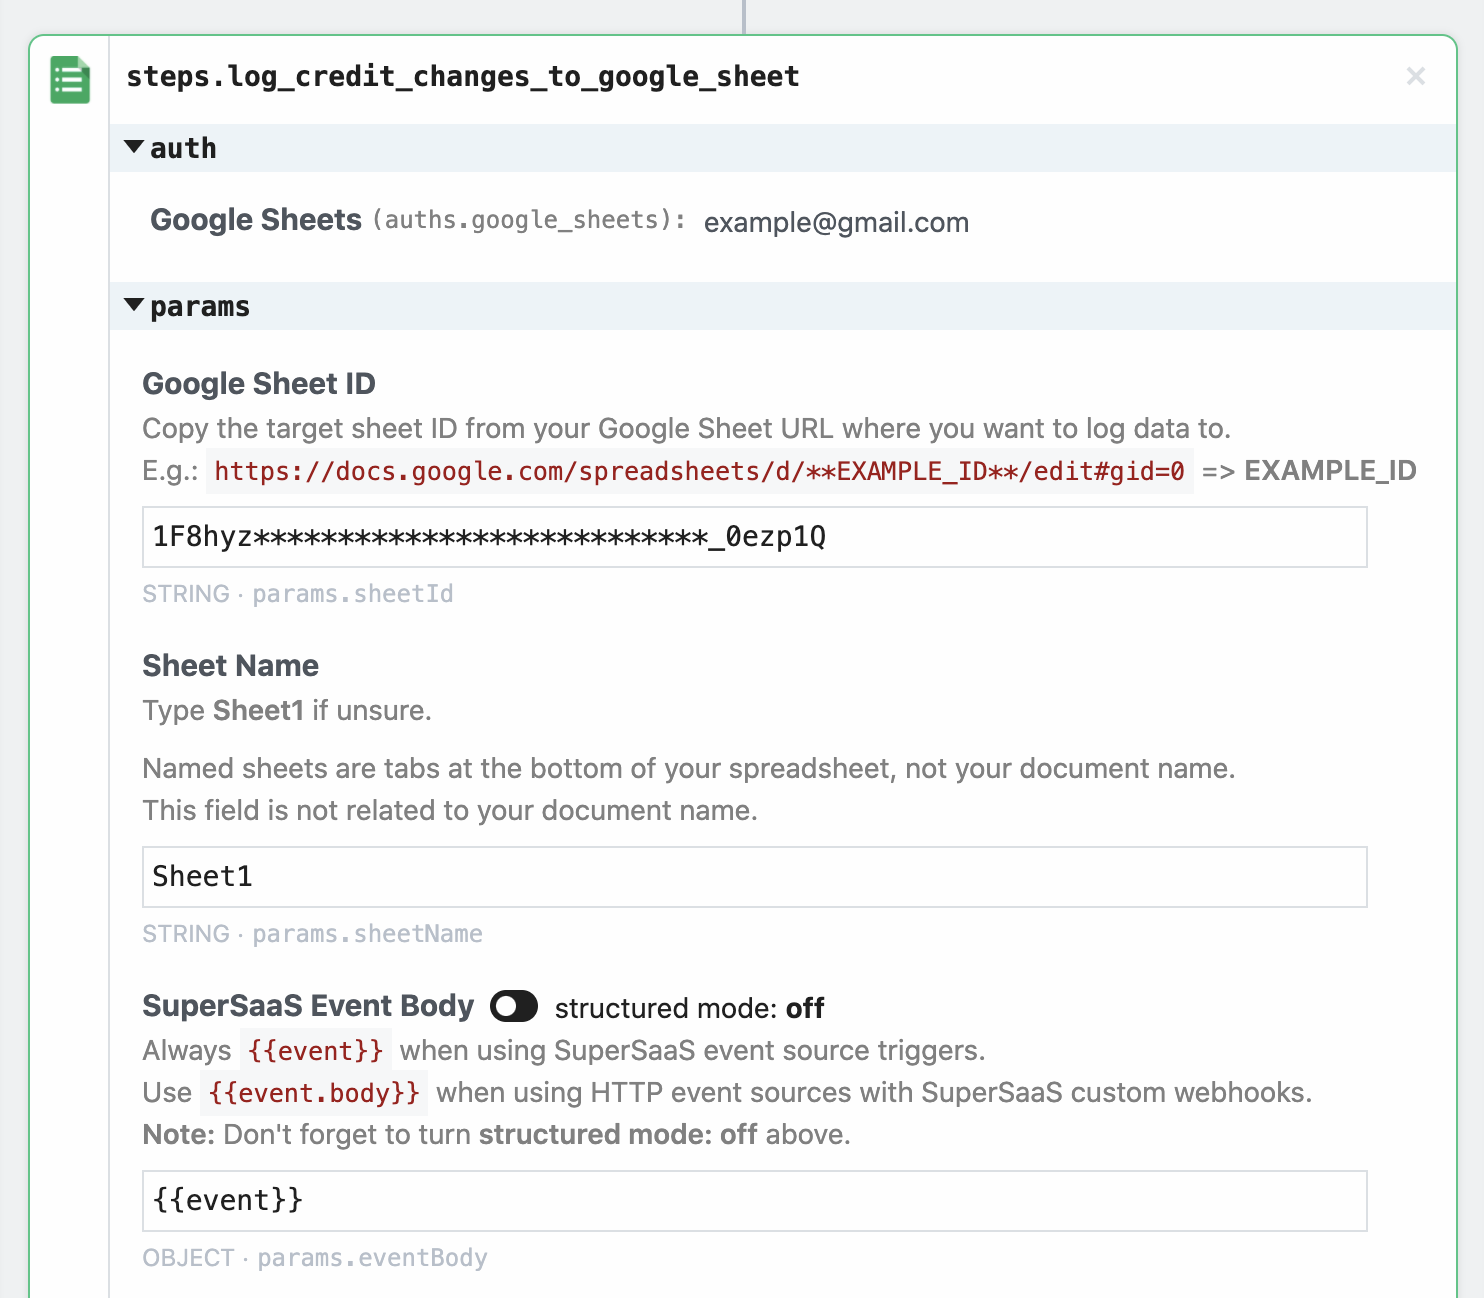
If you scroll down your workflow steps a little bit, you'll see the "log credit changes to Google Sheet" action.
Similarly, click the blue "Connect Google Sheets" button and follow the instructions to connect your Pipedream account to a Google Sheets account where you'll want to store your user credit logs.
Once successfully connected, open Google Sheets and create a spreadsheet to store your credit logs. You can name it whatever you’d like; the name won’t affect your workflow setup. If you change the sheet name from Sheet1 (in the tab at the bottom of your spreadsheet), take note: We’ll need it soon.
Copy the created Google Sheet ID from your spreadsheet’s URL. Google Sheets URLs look like: https://docs.google.com/spreadsheets/d/EXAMPLE_ID/edit#gid=0
We only want the EXAPMLE_ID bit.
Go back to your Pipedream workflow and paste the sheet ID in the Google Sheet ID field.
Fill out the sheet name field. Unless you’ve changed it, use Sheet1, which is Google Sheets default sheet name.
Make sure structured mode is off for the SuperSaaS Event Body field and enter the following: {{event.body}}
This will forward the event data from the trigger above into this log-to-sheet action step.
Your action step should look like this:
At this point, you should be able to click the "Deploy" button at the top of your workflow to deploy it.
Test to make sure it works!
Now that you have it all setup, make sure you create a new account, make appointments, and check your spreadsheet to see if it’s all working. After every user action, it should take less than 5 seconds for your spreadsheet update.
Use regular Google Sheets filters to check balance history for a single user over the date/time ranges you’re interested on.
Go beyond
If you’re excited about this kind of automation and service integration, maybe you want to build something else that suits your specific needs?
In that case, make sure to check out the other available SuperSaaS event sources/triggers for Pipedream:
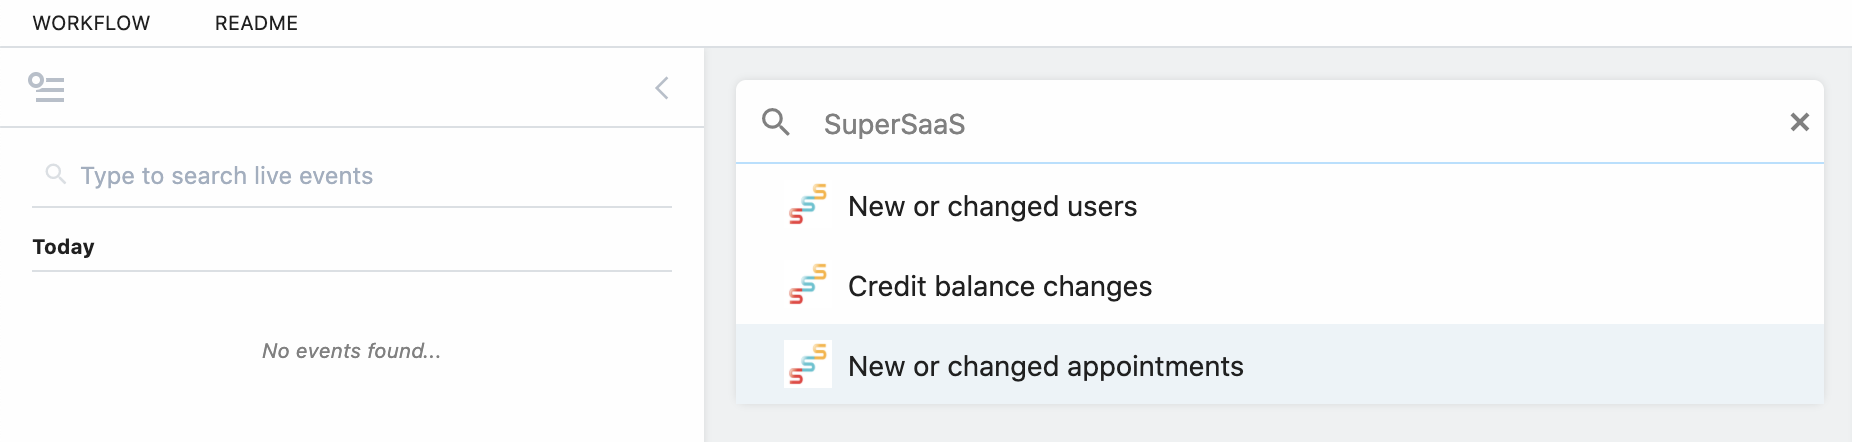
The trigger configuration procedure will always be very similar to the Credit balance changes one we created earlier, so hopefully you feel like playing with the other options as well.
If you're a programmer, you might want to try adapting our Google Sheets "Log SuperSaaS credit changes to sheet" action step to, say, Airtable or JotForm Tables, which may be more suitable to your needs.
Other integrations may not require a lot of technical knowledge, such as sending yourself e-mails when appointments are created or updated—free of charge.
Using SuperSaaS custom webhooks instead
If you’re using SuperSaaS triggers for Pipedream, what they’re really doing under the hood is setting up SuperSaaS webhooks against Pipedream’s HTTP/Webhook built-in triggers.
Using SuperSaaS’ premium custom webhooks feature, you can also manually do that and forward any possible SuperSaaS webhook events to your Pipedream workflows, even ones we haven’t integrated into Pipedream yet, such as the Changed form and Send mail events.
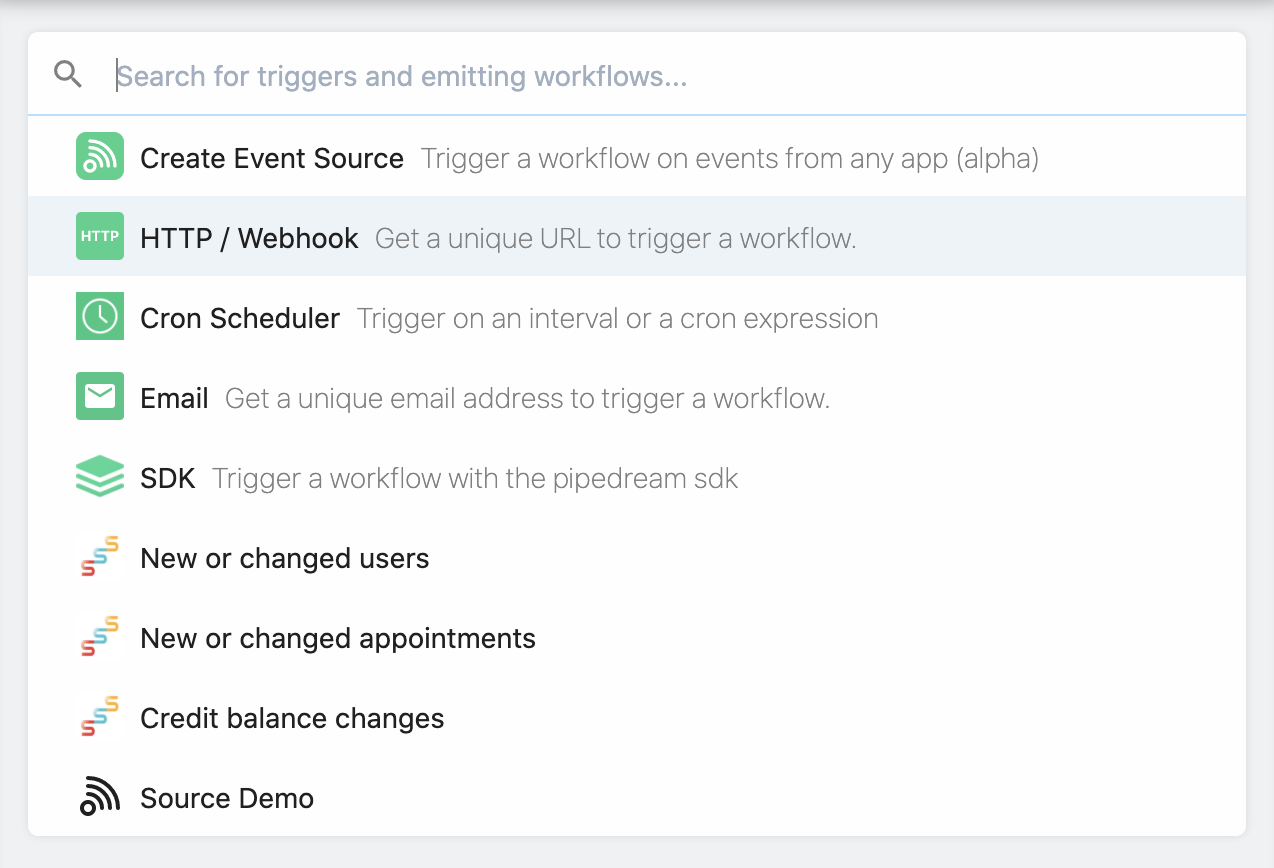
Let's say you'd like to setup a workflow that triggers everytime one of your users update a form: On your Pipedream account, click "New Workflow" again and select the "HTTP / Webhook" built-in trigger:
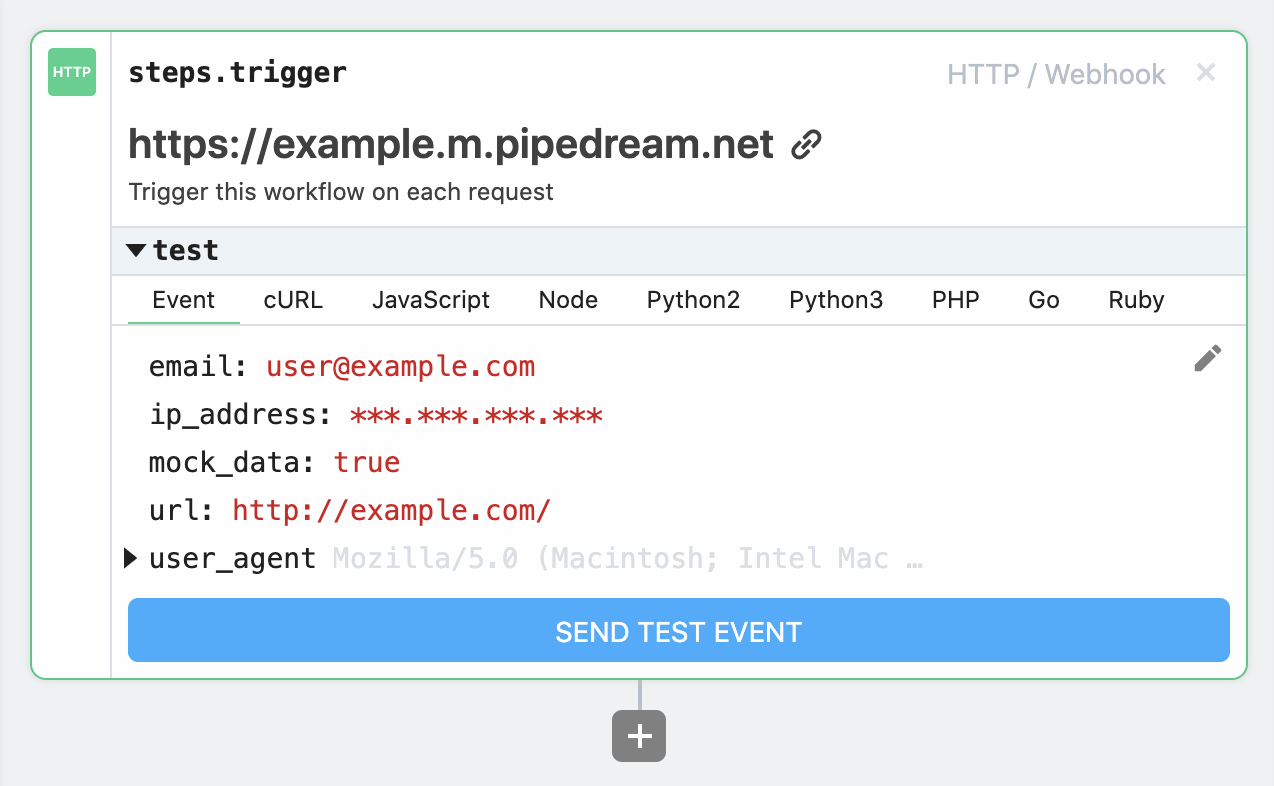
Copy the generated endpoint (e.g. https://example.m.pipedream.net) to the SuperSaaS custom webhooks page in your dashboard. Select the trigger you’re interested in (e.g. Changed form), fill in its parameters (if any, e.g. in this case, which form to track), and use your Pipedream HTTP endpoint as Target URL:
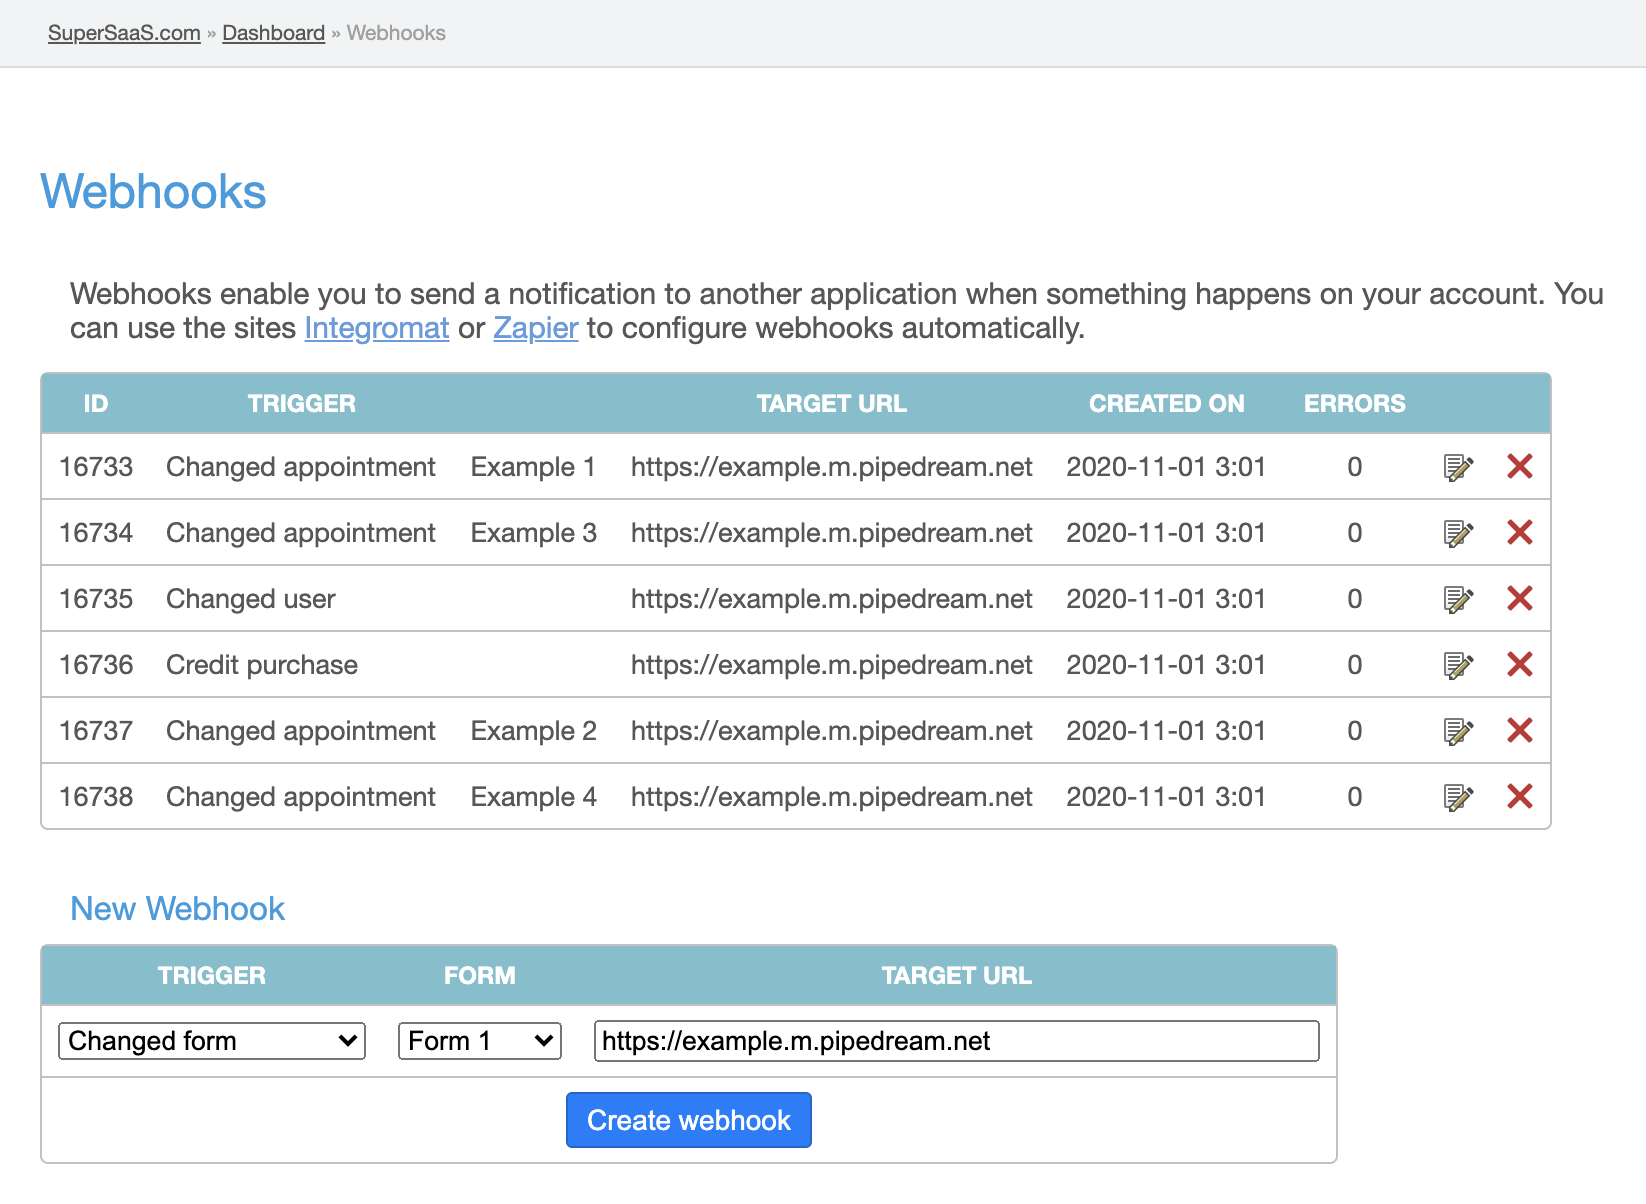
All the other existing webhooks in the screenshot were automatically created and are managed by the SuperSaaS Credit balance changes trigger we setup at the beginning of this tutorial.
You can also create multiple custom webhooks for the same Target URL if that makes sense for your particular use-case. As an example, Credit balance changes event sources require at least 3 webhooks, for example: Changed user, Credit purchase, and Changed appointment (one for each tracked schedule), and all point to the same workflow endpoint (the one being triggered by that event source).
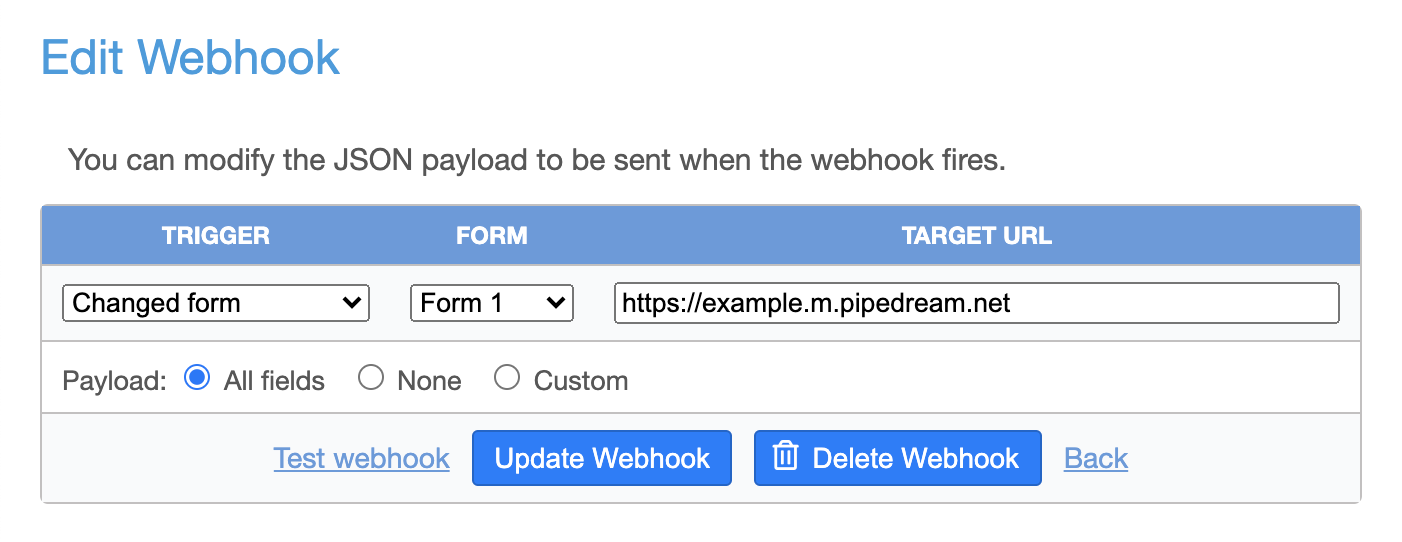
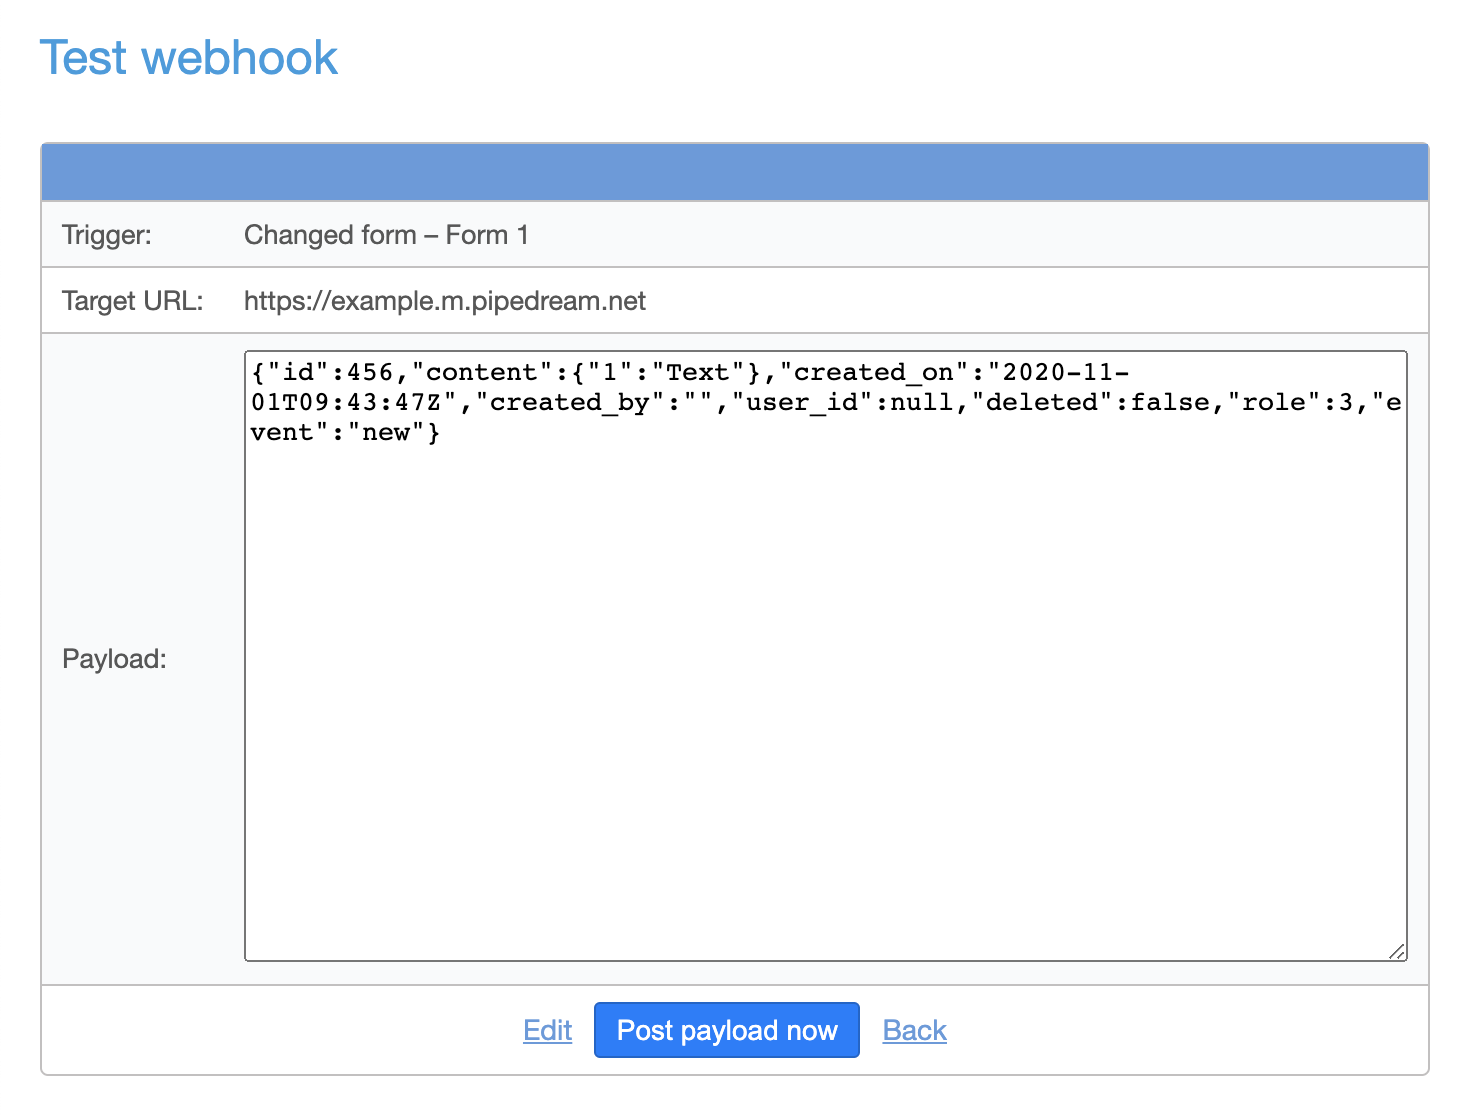
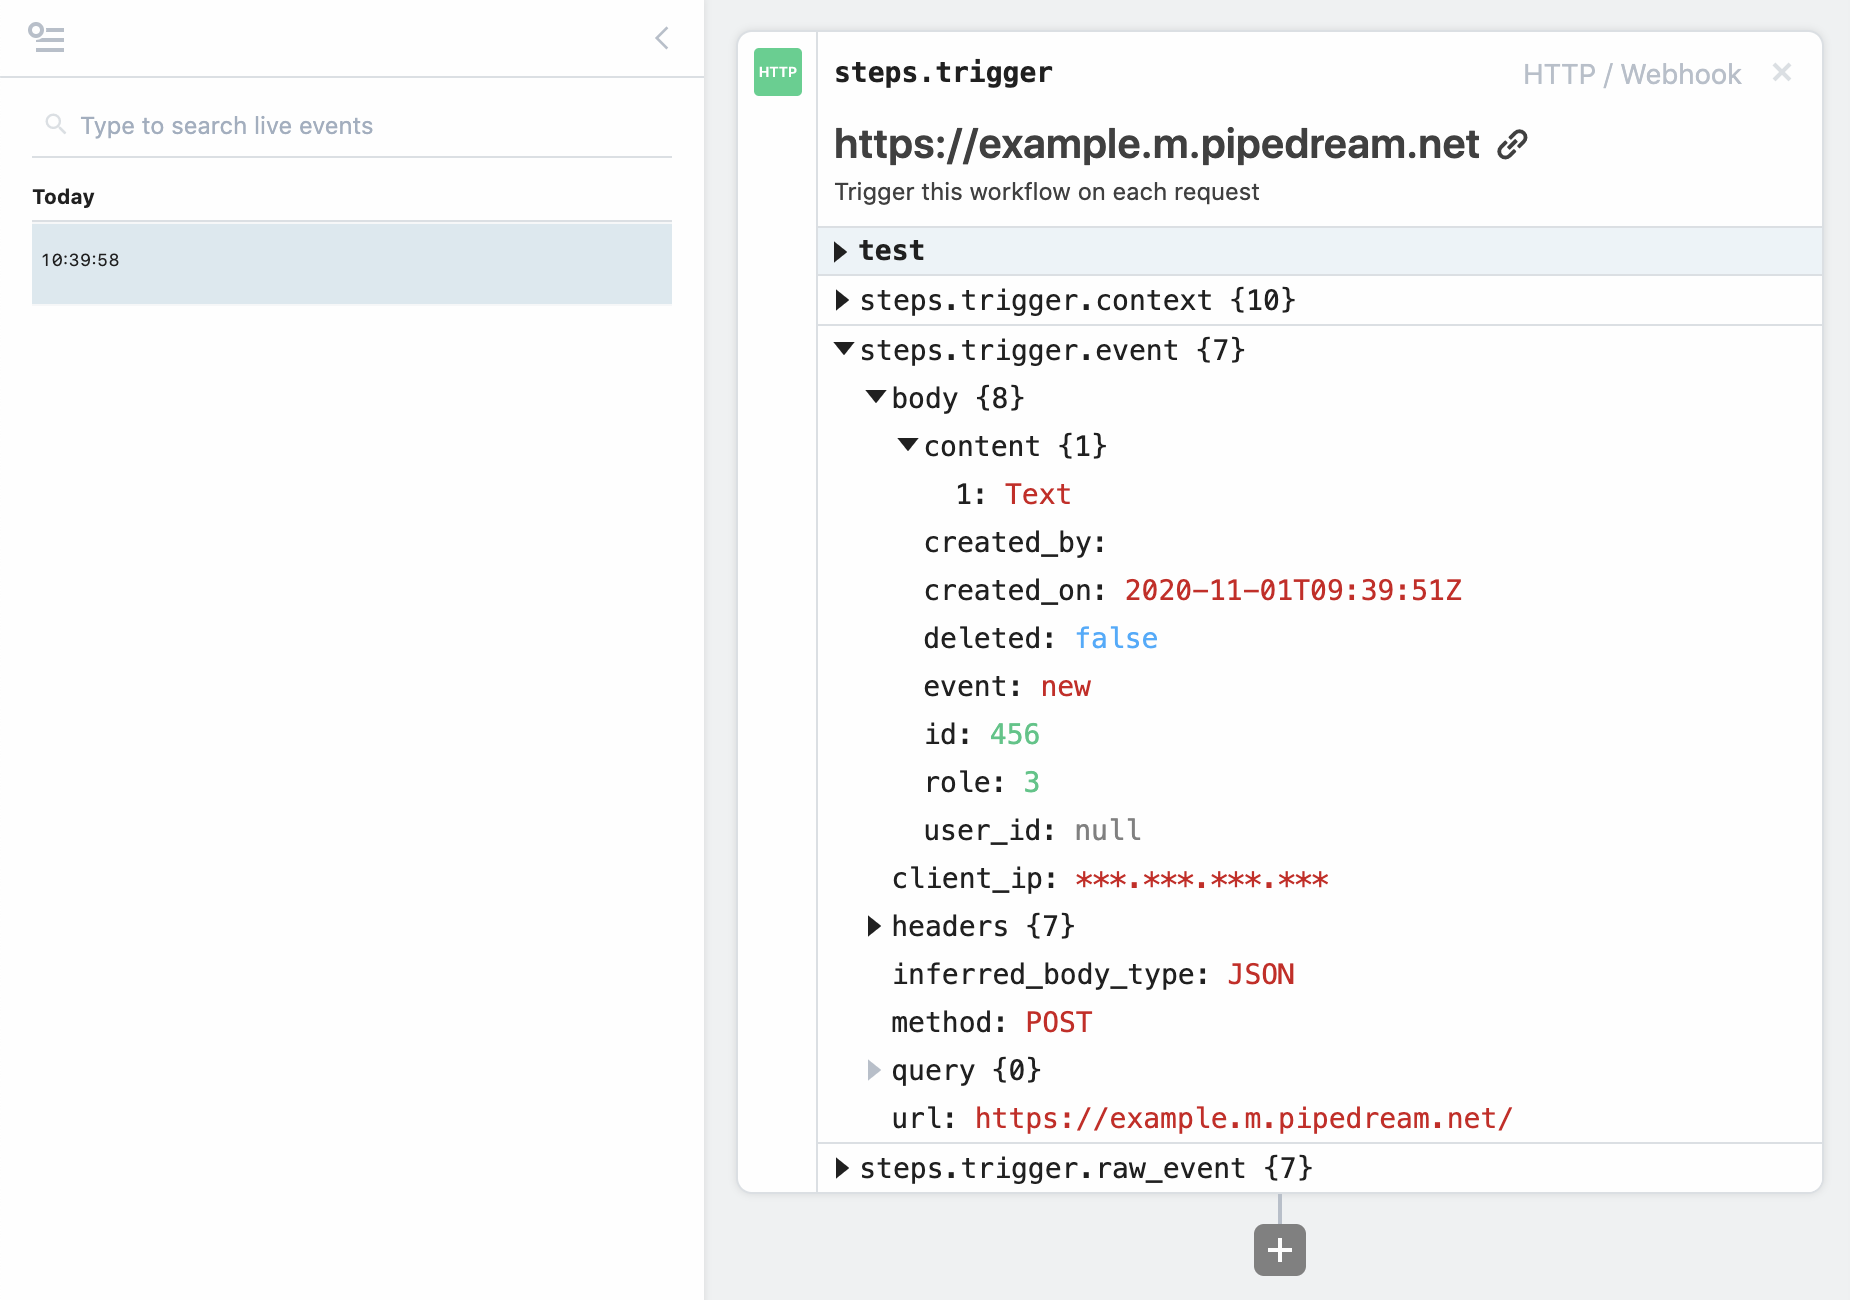
Once you create your custom webhook, you can click the "Test webhook" link, then the "Post payload now" button to send a test event to your workflow. You'll be able to use this test event as a reference for setting up the rest of your workflow, as well as easily replay it from the Pipedream UI to quickly give entire workflow a shot:
Once the payload is posted, you should soon see it in your Pipedream workflow:
With this, you’re good to add whatever Pipedream actions you see fit to be executed when your SuperSaaS account emits Changed form events for the form you’re tracking. Use them to send yourself an e-mail or anything else you need!